


First off – it is highly suggested that you take a close inventory of the desks in your office/floor or building. Having a firm understanding of how many desks there are, where they are located and any particular characteristics of the desks or areas will be helpful as you set up Meetio Desk. Once you got your inventory and know what "reality" looks like, it's time to set up your system and "mirror" that reality into virtual desks.
Log in to Meetio Admin or create a new account for your company by clicking “Register”
On your first login, you will be taken to the dashboard and be prompted with an initial setup guide. It is highly recommended that you go through the steps, but you can always close the page and come back to it later.
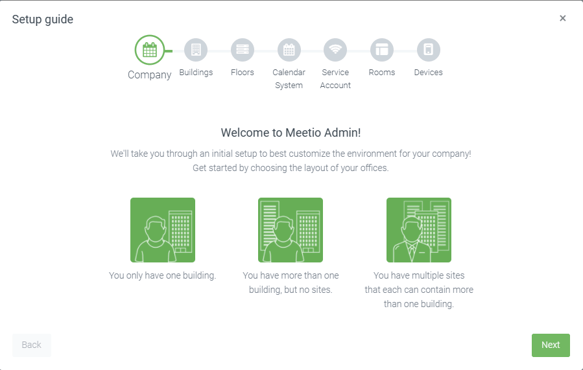
On the first step, you will be asked if you have one building, more than one building but no sites, or multiple sites with multiple buildings. You don’t need to map out your whole organization right now, as you can add buildings and sites at a later point.
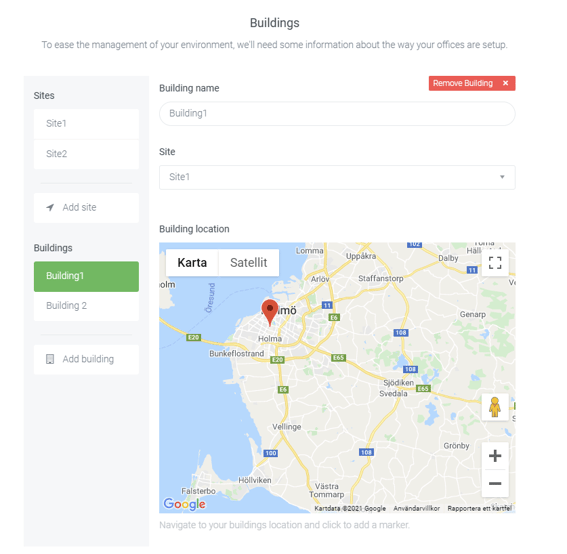
In the next step, you will create and name your sites/buildings. If you have sites, you will also have to pick a parent site for each building. As an optional step, you can also point out your buildings on Google Maps .
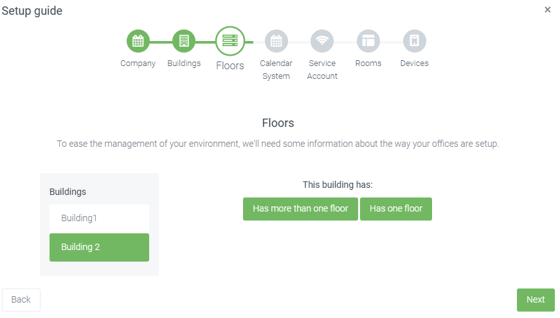
The next step will ask you to create floors in your buildings.
The next steps, “Calendar System” and “Service Account”, are mainly aimed at meeting rooms. If you are using Meetio Room/Meetio View, it’s a necessary step. If you are only using Meetio Desk, it is not necessary, but our mobile app will also display meeting room availability, so for a better user experience it is recommended to setup a service account and meeting rooms as the mobile app will pull capacity and resource data from Meetio Admin (you can read more about setting up a service account for Exchange/G-Suite/Office 365 in our other setup guides).
If you do not want to fill in the technical details right now, you can skip and the setup guide will end.
Refresh the page, and you will now see a new tab called “Buildings” under “Spaces”.
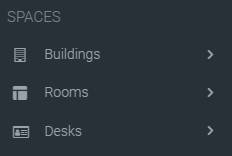
To start, begin by setting up workspaces under buildings. (https://admin.getmeetio.com/desks):
Workspace what?!
Workspaces are representations of groups of desks, used for sorting and searching for suitable desks.
In the Meetio app on your phone you will see the workspaces listed and be able to book a desk in a specific workspace:
.png?width=281&name=MicrosoftTeams-image%20(1).png)
The workspaces also make up the icons on your floorplan map (if you're implementing Meetio View with the map add-on in your Meetio setup):
.png?width=800&name=MicrosoftTeams-image%20(2).png)
A workspace could be just 4 desks put together, contain all desks in a room or even a part of a floor. Typically, all desks in a workspace would hold the same characteristics and be located in close proximity to each other.
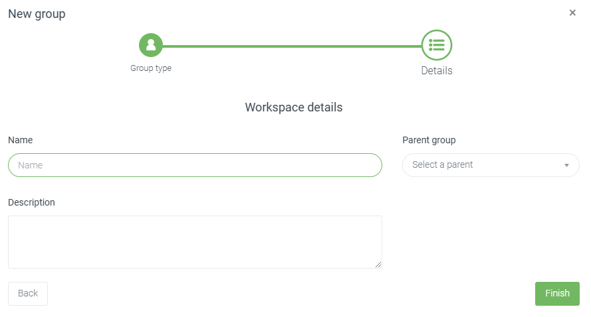
Start by pressing "New Group" -> “Workspaces” and go ahead and create some workspaces that you feel represents your office:
This is when things start to happen! Once the virtual desks are created and licensed, a digital calendar will be created for each and the desks can be booked by users on their phones.
You can either fill your workspaces with an individual desk at the time or add multiple desks to a workspace based on the same nomenclature (i.e. Silent Desk 1, Silent Desk 2, Silent Desk X and so forth):
.png?width=500&name=MicrosoftTeams-image%20(4).png)
Once you have created the desks, you will need to allocate a license to each. This can be accessed through the edit icon of each desk:
.png?width=295&name=MicrosoftTeams-image%20(5).png)
You can alter the rulesets or settings for each individual desk by pressing the edit icon as well or manage settings and ruleset for the whole workspace by pressing "Manage workspace" and then "Edit settings":
.png?width=238&name=MicrosoftTeams-image%20(6).png)
The rules set per desk will affect all user’s ability to book a desk – be it through the Meetio app on your phone or on a desk puck unit.
Note: Requires Meetio View with map add-on
If you don't have a map for Meetio View created already, but ordered a map to be created of your office – start by contacting your Meetio representative and provide the materials requested: https://www.meetio.com/resources/guides/map-specification to have the map created by Meetio.
Once you have a map of your floor you will find it in the left hand panel under MEDIA → Maps:
.png?width=271&name=MicrosoftTeams-image%20(7).png)
Open the map by clicking on the image.
Choose "Add workspace". Drag and drop the new workspace label where you want it to go. Under "Workspace connection", choose which workspace that corresponds with the new workspace label. Confirm and save:
.png?width=626&name=MicrosoftTeams-image%20(8).png)
If you haven't done so already, don't forget to assign the map to your Meetio View device. There you can also control the workspace label font size.
Booking a desk can be done from the phone of your co-workers or on the desk itself (if you're adding the Meetio Desk puck to your office setup).
If you haven't distributed the Meetio phone app to your co-workers already, you can find the full guide here.
The desks you have set up will be readily available to your colleauges without any additional action needed.
And that's it – you're done! Don't hesitate to reach out to us if you need any help.
Happy hot desking!
.png?width=2004&name=MicrosoftTeams-image%20(1).png)